> ## Documentation Index
> Fetch the complete documentation index at: https://docs.viddyscribe.com/llms.txt
> Use this file to discover all available pages before exploring further.
# Generate Your First Description
> Step-by-step guide to creating your first audio-described video in the ViddyScribe dashboard
With your ViddyScribe Enterprise workspace set up, it's time to create your first audio-described video. ViddyScribe's AI engine does the heavy lifting, analyzing your video and generating natural-sounding descriptions.
## Step 1: Upload Your Video
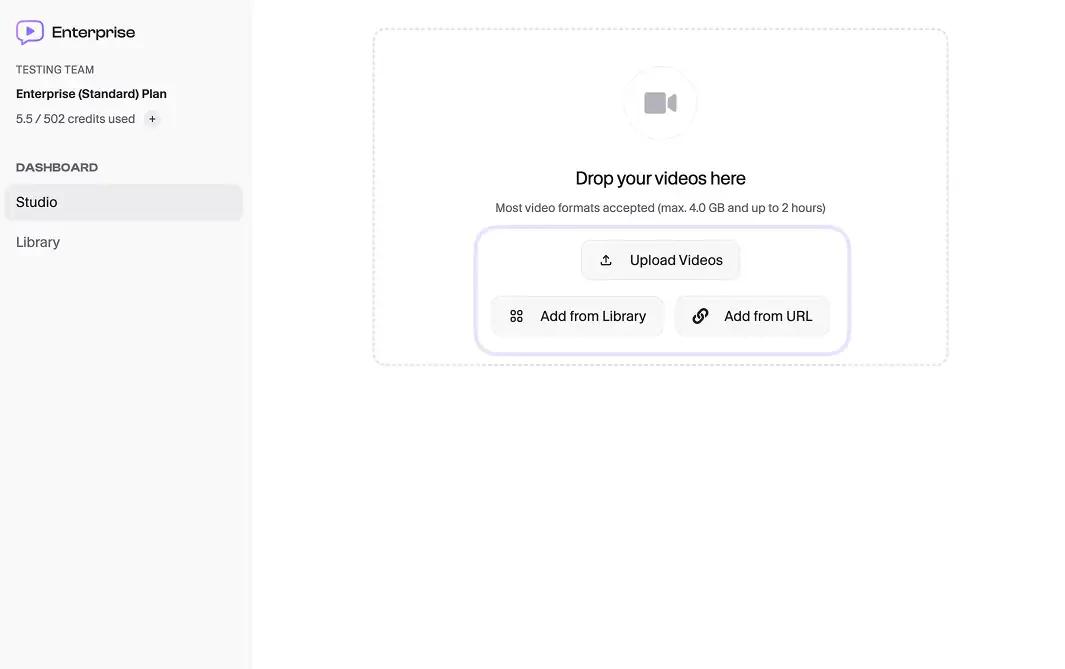
Start by navigating to the **Studio** tab in your dashboard and clicking the **Upload Videos** button.
You can upload a video file directly from your computer. Alternatively, you can add videos that have already been uploaded with the **Add from Library** button, or add a link to a supported external video source with the **Add from URL** button.
Note that in order to use the **Add from URL** function, external links must be publicly accessible, and point directly to the video itself, e.g. `/filename.mp4`. Pasting a link to a page where the video is hosted, such as a YouTube link, will not load videos into ViddyScribe.
 ## Step 2: Select Your Generation Mode
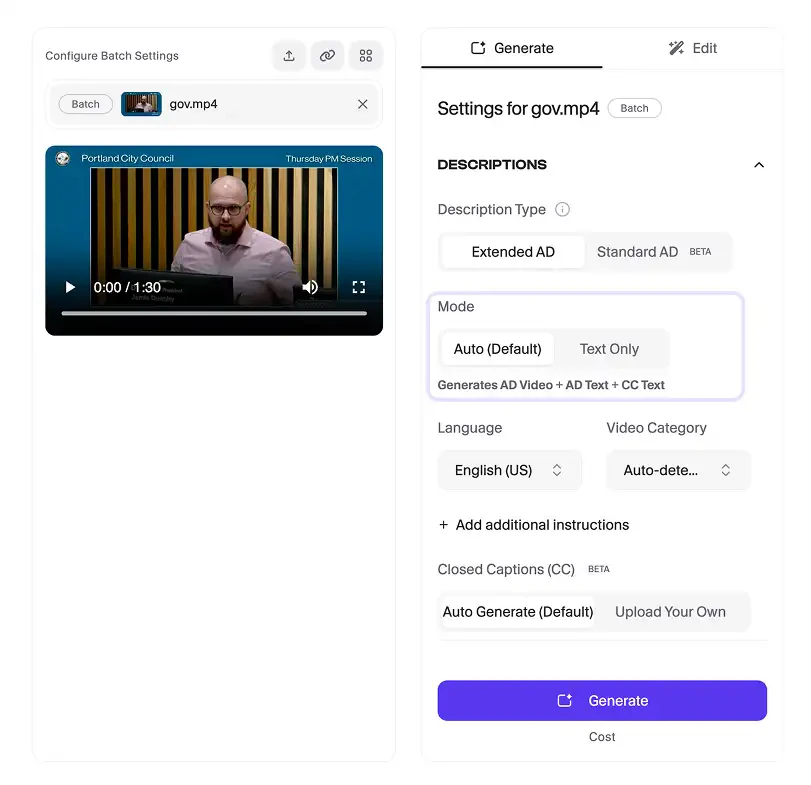
Choose how much of the workflow you want ViddyScribe to run in one go:
* **Full:** ViddyScribe generates the AD script, converts it to speech, and encodes it into your video automatically, a complete end-to-end run. Uses 1x credits.
* **Text Only:** ViddyScribe generates *only* the AD script, so you can review and edit the descriptions before converting them to speech and encoding them into your video. Cosumes 0.5x credits for Text-only and then 0.5x later for Editing it into the video (output video generation with descriptions). Useful when you want editorial control over wording before any audio is produced.
## Step 2: Select Your Generation Mode
Choose how much of the workflow you want ViddyScribe to run in one go:
* **Full:** ViddyScribe generates the AD script, converts it to speech, and encodes it into your video automatically, a complete end-to-end run. Uses 1x credits.
* **Text Only:** ViddyScribe generates *only* the AD script, so you can review and edit the descriptions before converting them to speech and encoding them into your video. Cosumes 0.5x credits for Text-only and then 0.5x later for Editing it into the video (output video generation with descriptions). Useful when you want editorial control over wording before any audio is produced.
 ## Step 3: Choose Your Audio Description Type
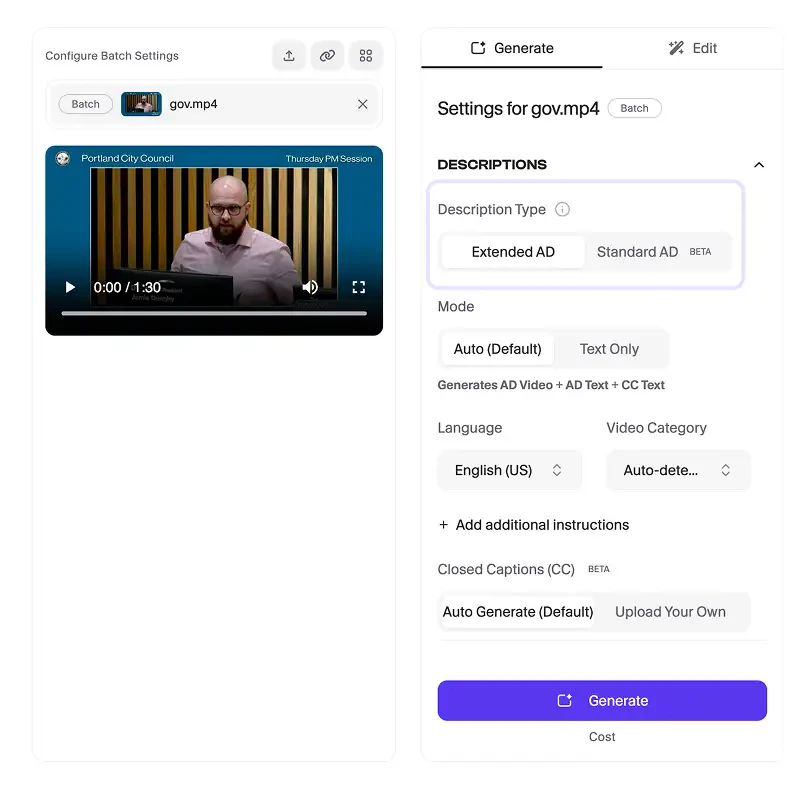
ViddyScribe Enterprise offers two types of audio description to ensure compliance with WCAG and ADA standards. It's crucial to select the right one for your content:
* **Standard AD:** This type inserts descriptions *only* into the natural pauses in the video's original audio track. It does not alter the length of the video. This is ideal when your video already has sufficient quiet moments to fit the descriptions.
* **Extended AD:** If your video has continuous dialogue or fast-paced action with very few pauses, Extended AD is the solution. ViddyScribe will temporarily pause the video visually while the description plays, ensuring no critical visual information is missed by the visually impaired viewer.
## Step 3: Choose Your Audio Description Type
ViddyScribe Enterprise offers two types of audio description to ensure compliance with WCAG and ADA standards. It's crucial to select the right one for your content:
* **Standard AD:** This type inserts descriptions *only* into the natural pauses in the video's original audio track. It does not alter the length of the video. This is ideal when your video already has sufficient quiet moments to fit the descriptions.
* **Extended AD:** If your video has continuous dialogue or fast-paced action with very few pauses, Extended AD is the solution. ViddyScribe will temporarily pause the video visually while the description plays, ensuring no critical visual information is missed by the visually impaired viewer.
 ## Step 4: Select Language and Video Category
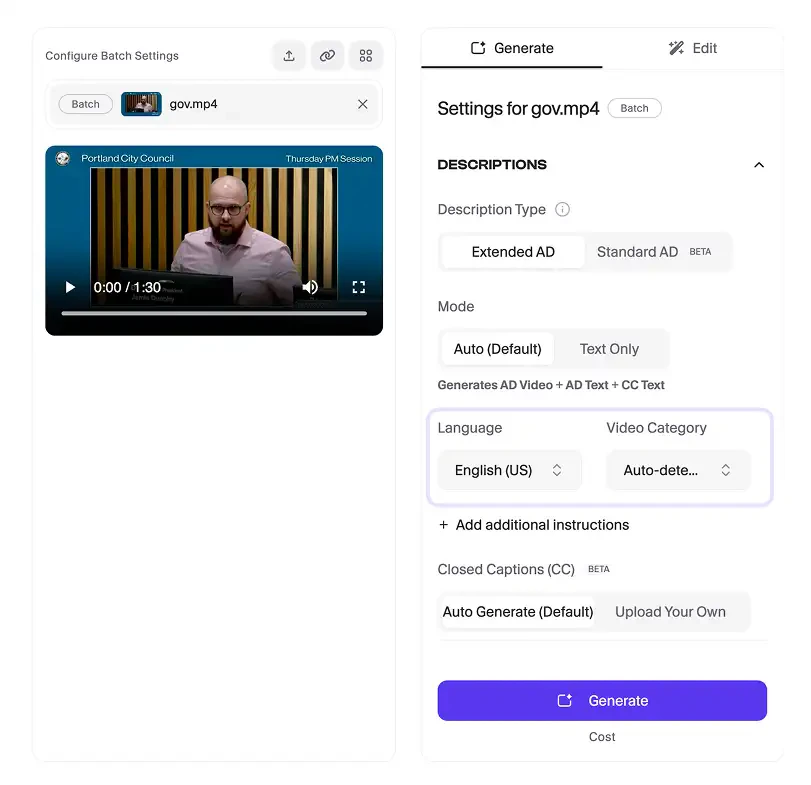
ViddyScribe supports multiple languages and dialects. If the language or dialect you need is not available, email `support@viddyscribe.com` to make a request. Note that not all languages or dialects can be accommodated.
## Step 4: Select Language and Video Category
ViddyScribe supports multiple languages and dialects. If the language or dialect you need is not available, email `support@viddyscribe.com` to make a request. Note that not all languages or dialects can be accommodated.
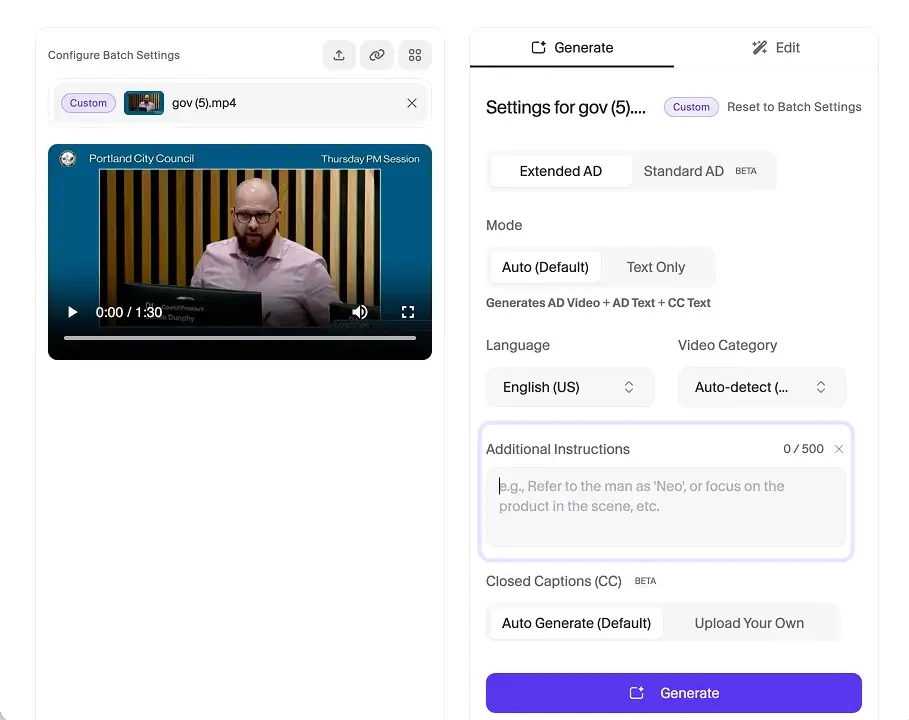
 ## Step 5: Give ViddyScribe Additional Instructions (Optional)
These settings fine-tune ViddyScribe's initial output and tailor them with proper context for your viewers.
* In the **Additional Instructions** field, add up to 2000 characters to tell ViddyScribe how to describe your video. This can be useful for subject/character names, description tone, or a custom glossary of terms.
## Step 5: Give ViddyScribe Additional Instructions (Optional)
These settings fine-tune ViddyScribe's initial output and tailor them with proper context for your viewers.
* In the **Additional Instructions** field, add up to 2000 characters to tell ViddyScribe how to describe your video. This can be useful for subject/character names, description tone, or a custom glossary of terms.
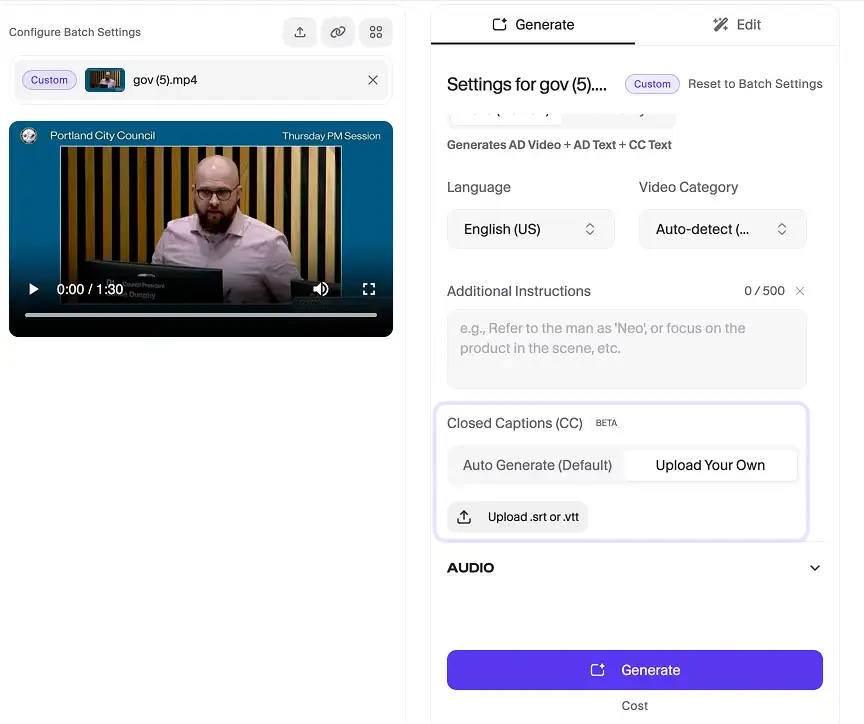
 ## Step 6: Closed Captions
If you have your own closed captions file, you can upload them to ViddyScribe so that it will incorporate them with your generated outputs. If you don't have your own closed captions file, leave **Auto-generate Captions** checked.
## Step 6: Closed Captions
If you have your own closed captions file, you can upload them to ViddyScribe so that it will incorporate them with your generated outputs. If you don't have your own closed captions file, leave **Auto-generate Captions** checked.
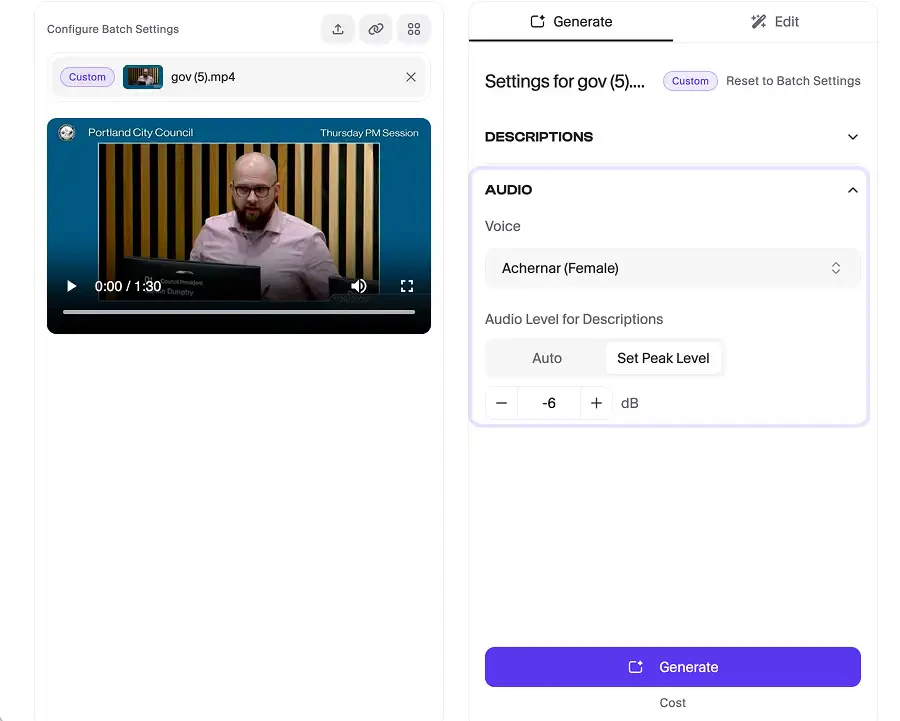
 ## Step 7: Select Voice and Peaking Level
These options are available if you have selected the **Full** generation mode.
* Listen to the voice previews and select the one that best fits the tone and style of your content.
* Manually choose your desired peaking level for generated speech.
* If you have selected **Text Only**, you will select your voice and peaking level in the Edit tab instead of the Generate tab. See [Editing in the Timeline](/dashboard/timeline-editor) for the full editing workflow.
## Step 7: Select Voice and Peaking Level
These options are available if you have selected the **Full** generation mode.
* Listen to the voice previews and select the one that best fits the tone and style of your content.
* Manually choose your desired peaking level for generated speech.
* If you have selected **Text Only**, you will select your voice and peaking level in the Edit tab instead of the Generate tab. See [Editing in the Timeline](/dashboard/timeline-editor) for the full editing workflow.
 ## Step 8: Generate
Once you've configured your settings, click **Generate**. ViddyScribe will now process your video.
The processing time depends on the length of your video, but you can navigate away from the page while it works. Your output will appear at the top of your Library when it is complete.
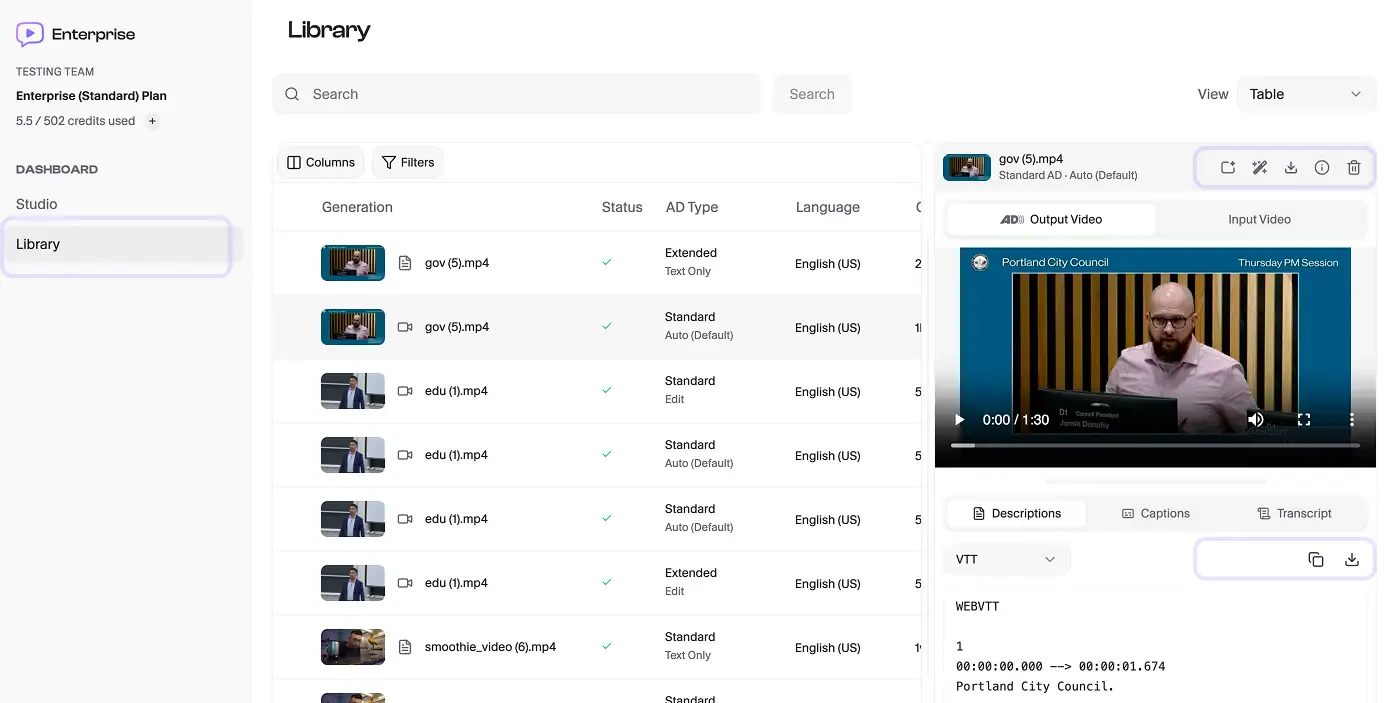
## Step 9: Download Your Accessible Video Outputs
Unlike Individual plans where users can only share links, ViddyScribe Enterprise gives you full control over your assets. Once processing is complete, head over to **Library** to download your files in several formats:
* **Burned-in Video (MP4):** A new video file with the audio description track permanently mixed in.
* **Audio Track Only (WAV):** Standard AD outputs will optionally provide the isolated audio description track, which is useful if you are mixing it yourself in an external video editor or sideloading it into an existing video on a platform like YouTube.
* **Description, Caption, and Transcript (VTT, TXT, JSON, and more):** A text transcript of the descriptions with timestamps.
## Step 8: Generate
Once you've configured your settings, click **Generate**. ViddyScribe will now process your video.
The processing time depends on the length of your video, but you can navigate away from the page while it works. Your output will appear at the top of your Library when it is complete.
## Step 9: Download Your Accessible Video Outputs
Unlike Individual plans where users can only share links, ViddyScribe Enterprise gives you full control over your assets. Once processing is complete, head over to **Library** to download your files in several formats:
* **Burned-in Video (MP4):** A new video file with the audio description track permanently mixed in.
* **Audio Track Only (WAV):** Standard AD outputs will optionally provide the isolated audio description track, which is useful if you are mixing it yourself in an external video editor or sideloading it into an existing video on a platform like YouTube.
* **Description, Caption, and Transcript (VTT, TXT, JSON, and more):** A text transcript of the descriptions with timestamps.
 Need to make a few tweaks before exporting? No problem. Our next guide covers how to use the Edit tab to perfect your descriptions.
**Next:** [Editing in the Timeline](/dashboard/timeline-editor)
Need to make a few tweaks before exporting? No problem. Our next guide covers how to use the Edit tab to perfect your descriptions.
**Next:** [Editing in the Timeline](/dashboard/timeline-editor)